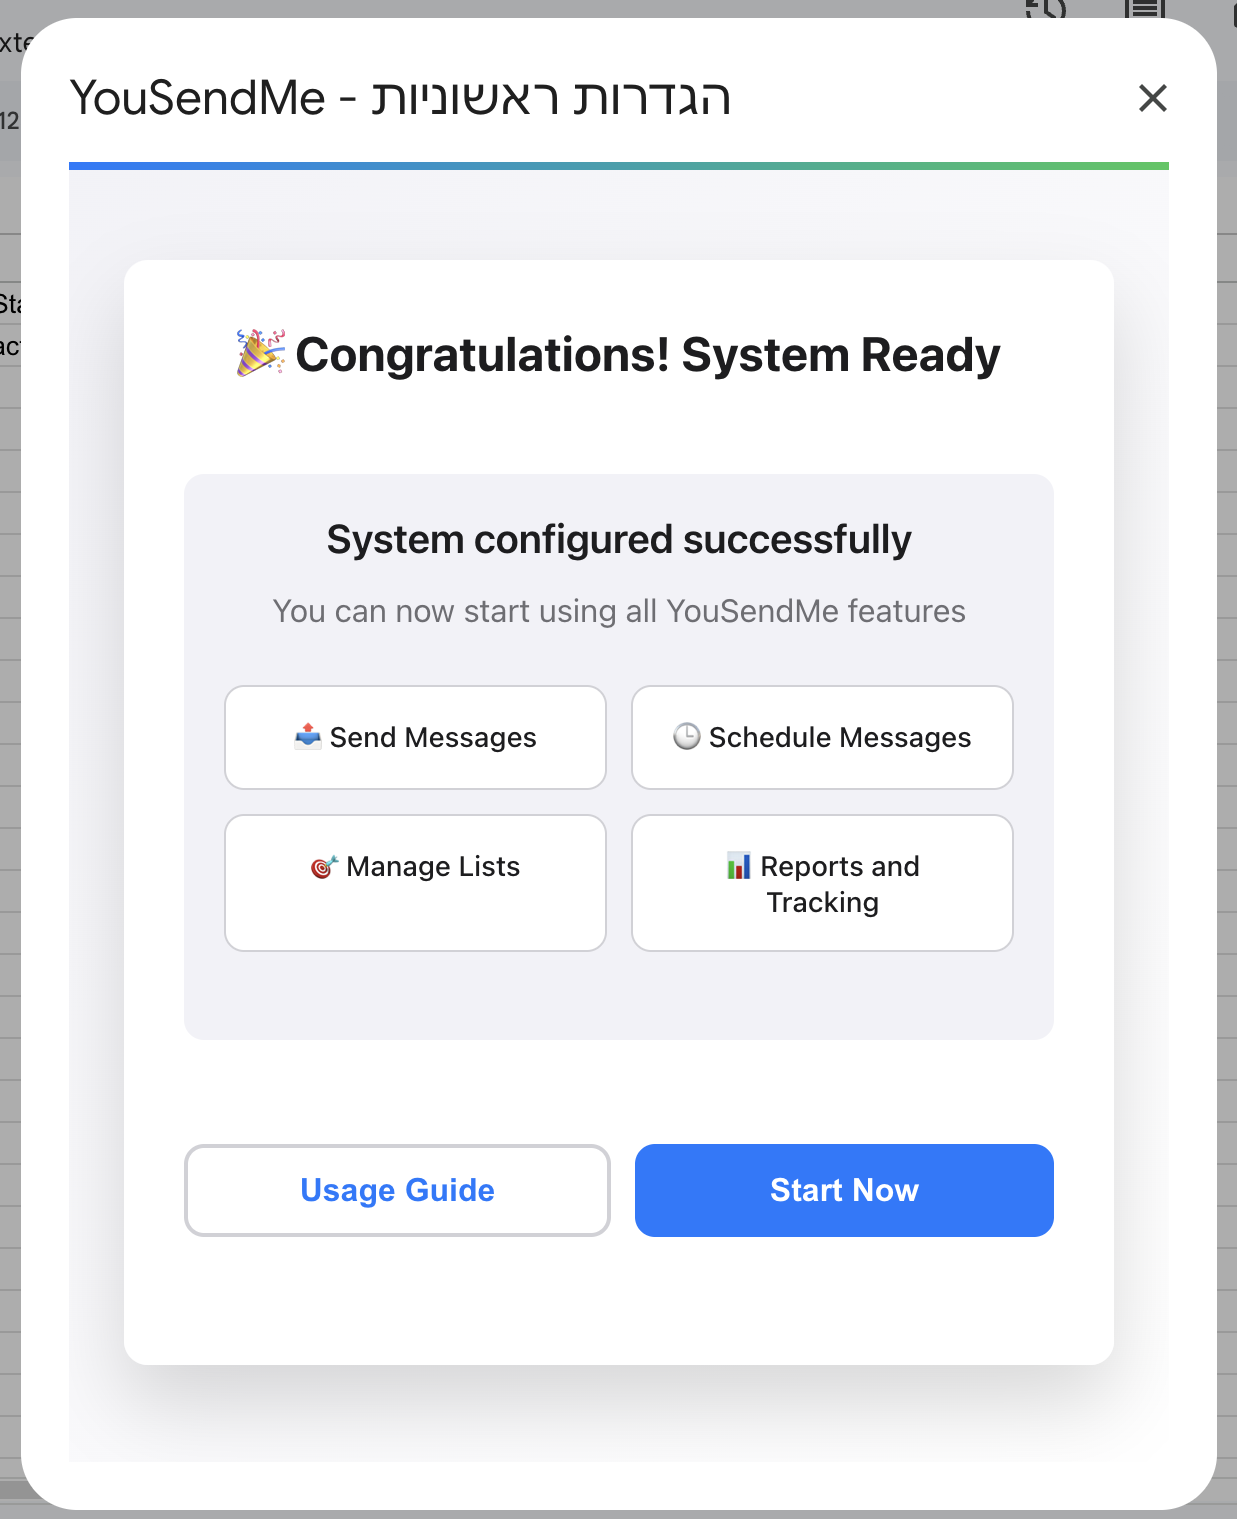
1. Getting Started
Open the add-on and start the guided onboarding
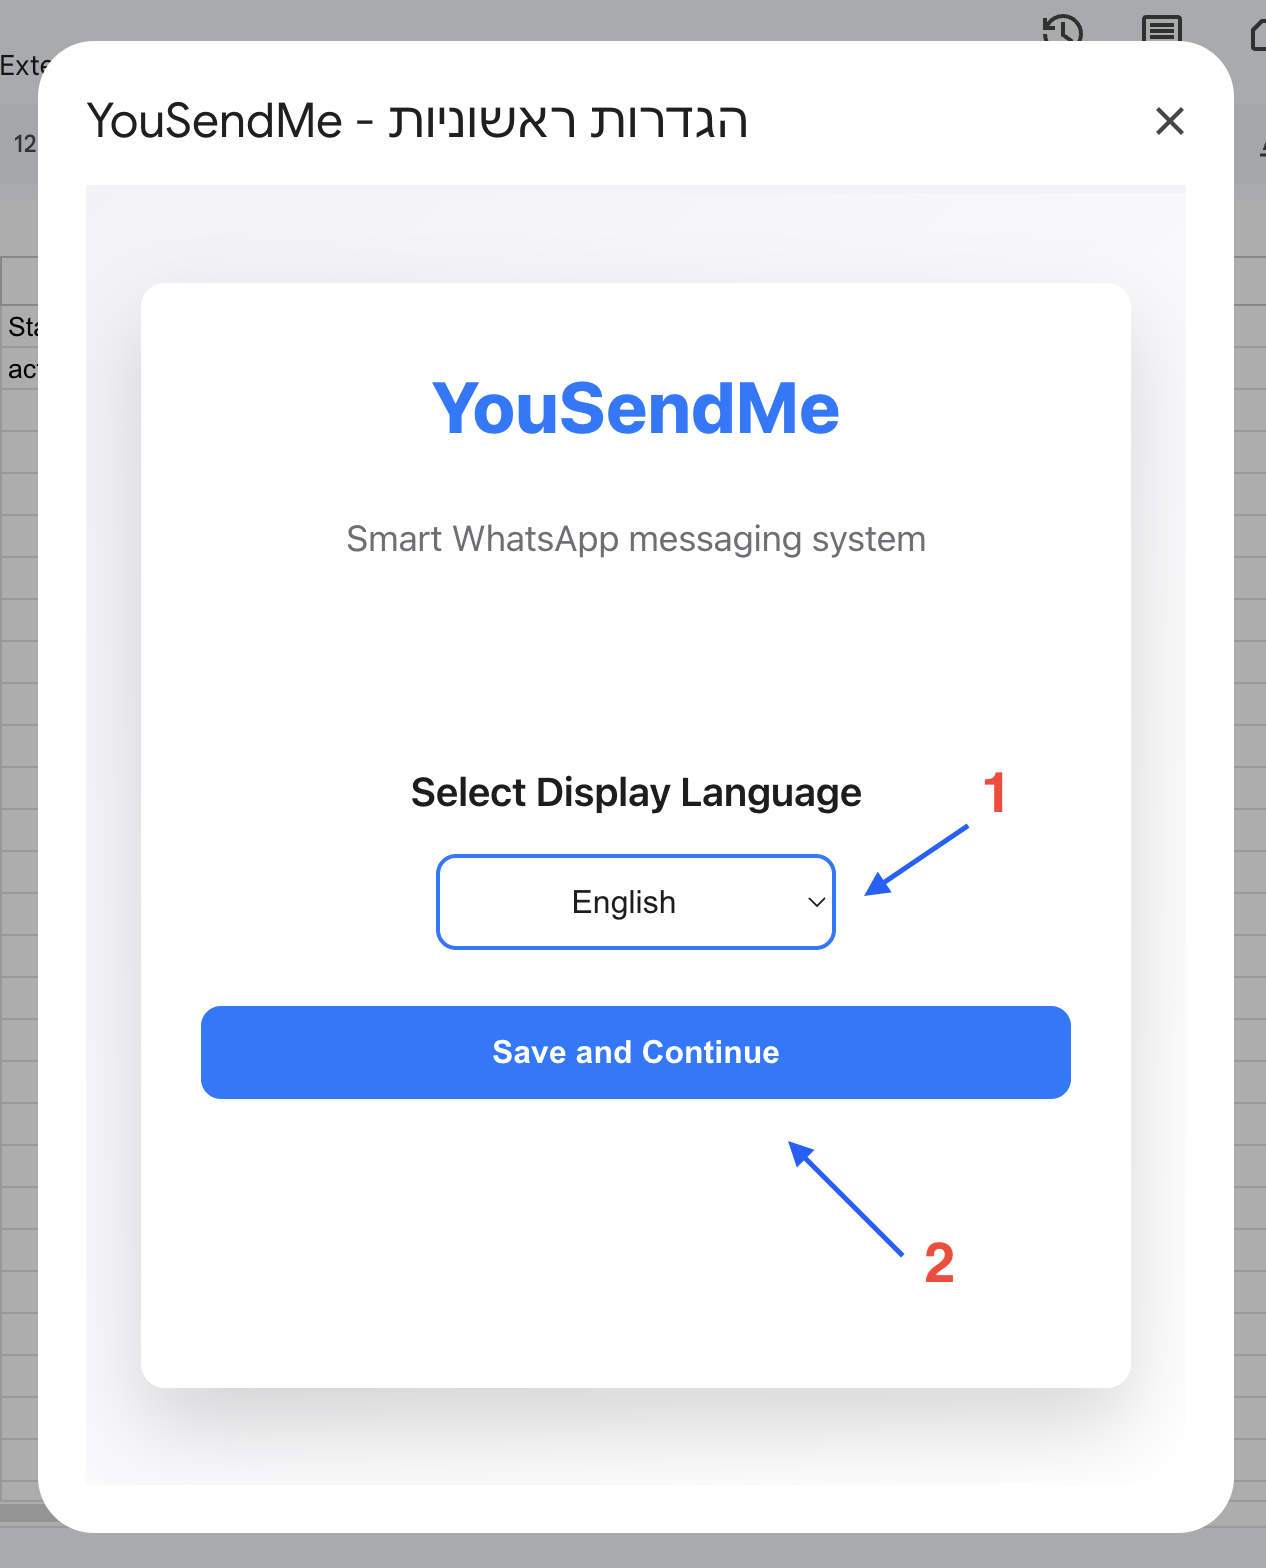
The first goal is to get into the guided setup flow from a clean sheet. Do not start by tweaking random settings. Open the add-on, choose the onboarding path, and let the product drive the order of the checks.
Use a test spreadsheet for onboarding and screenshots. It keeps setup state, sending state, and later troubleshooting easier to reason about.
- Open a Google Sheet that you can safely use for testing.
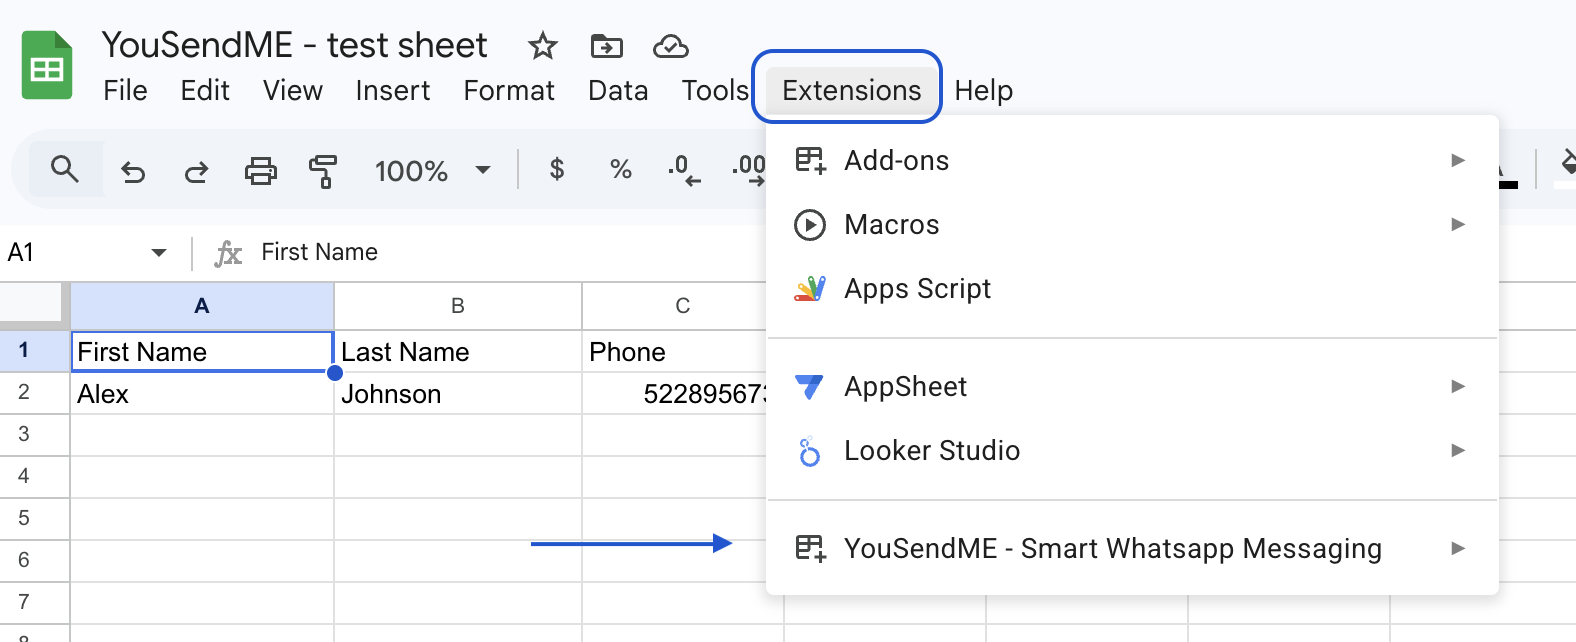
- Launch YouSendME from the extensions menu.
- Use the Start Here entry point if this is your first setup on that sheet.
- Finish setup before attempting regular sends, schedules, surveys, or bots.

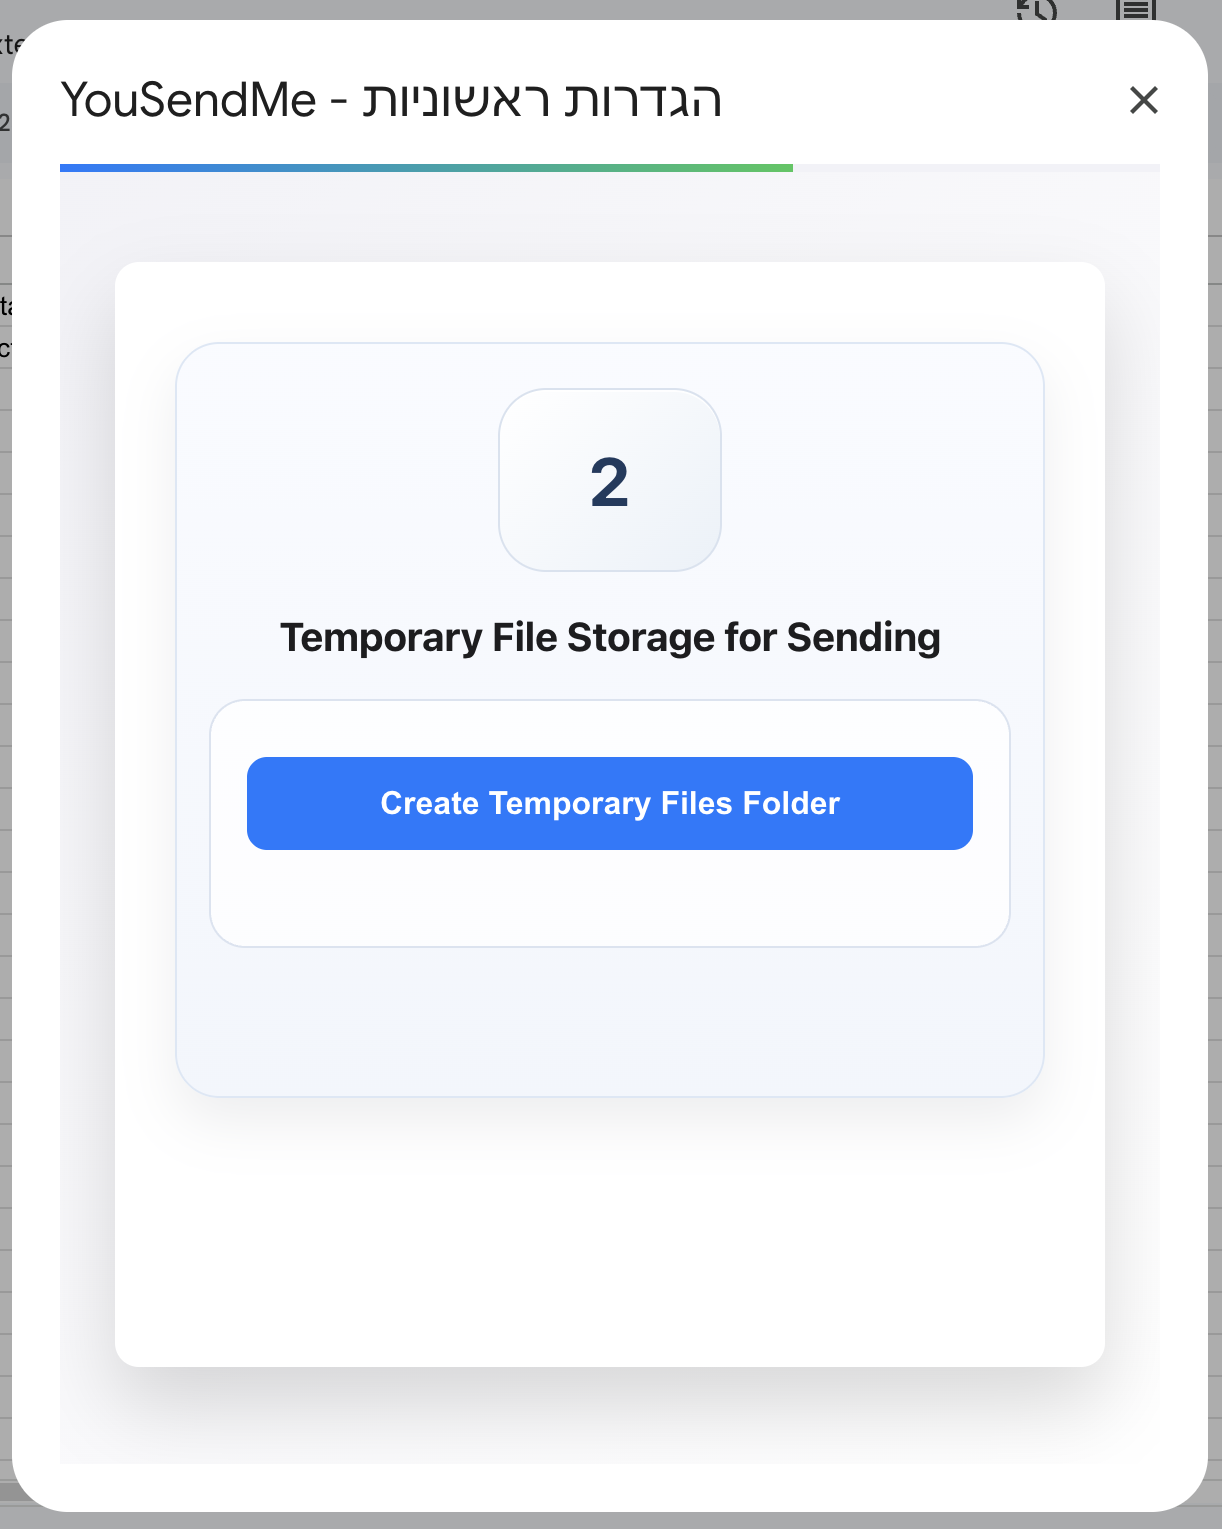
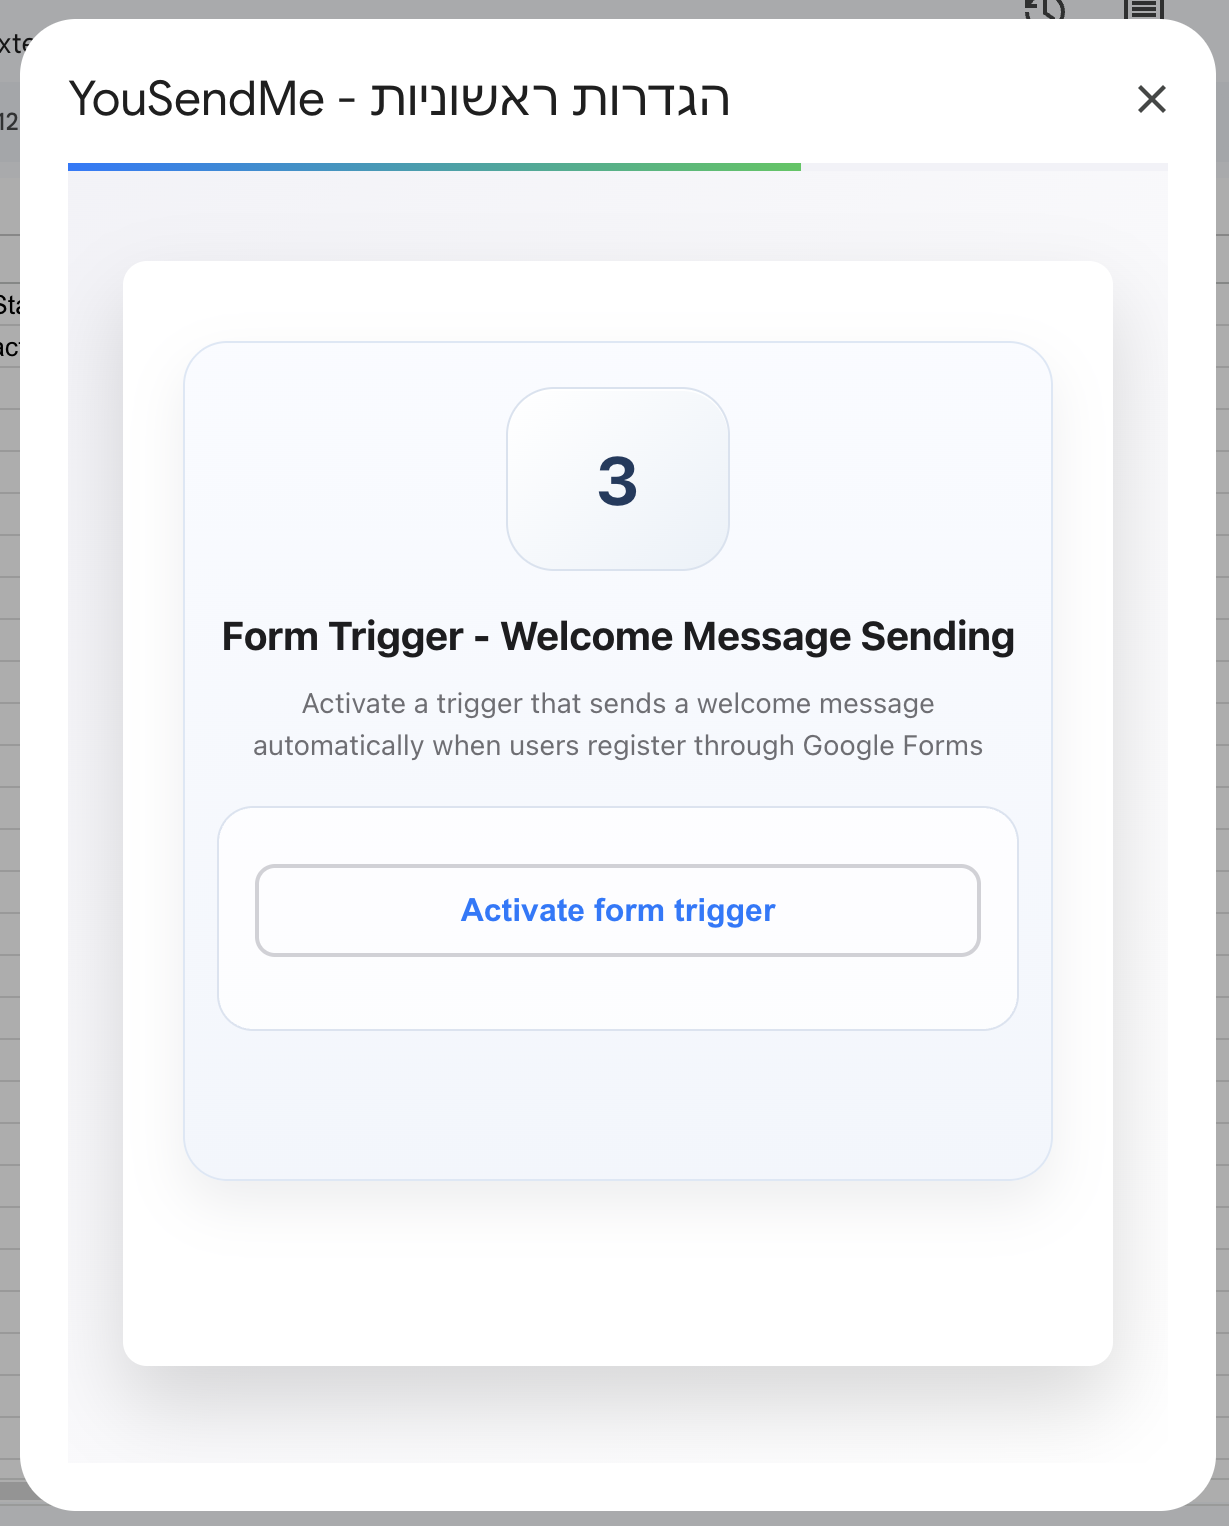
2. Setup Flow
Finish setup in the order the product expects
The setup flow is server-checked. A screen looking complete is not enough if the server-side check failed or was skipped. That is why users get into trouble when they jump between steps manually.
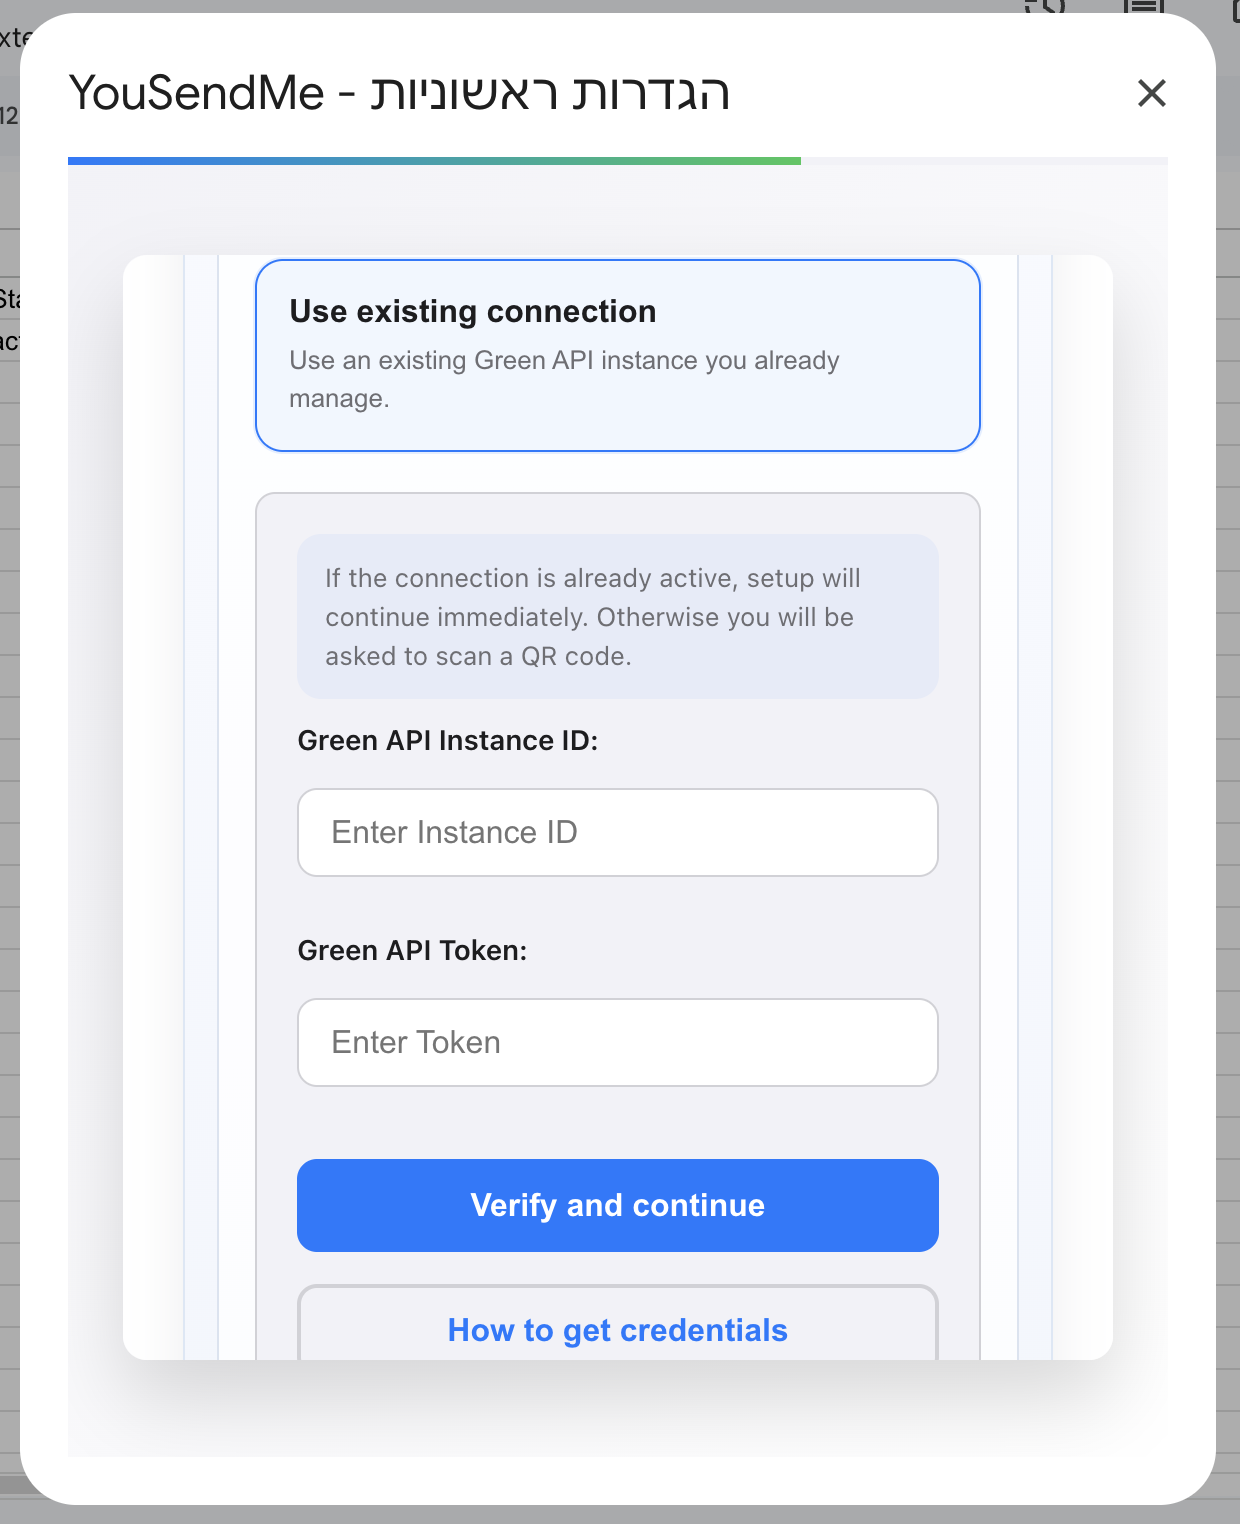
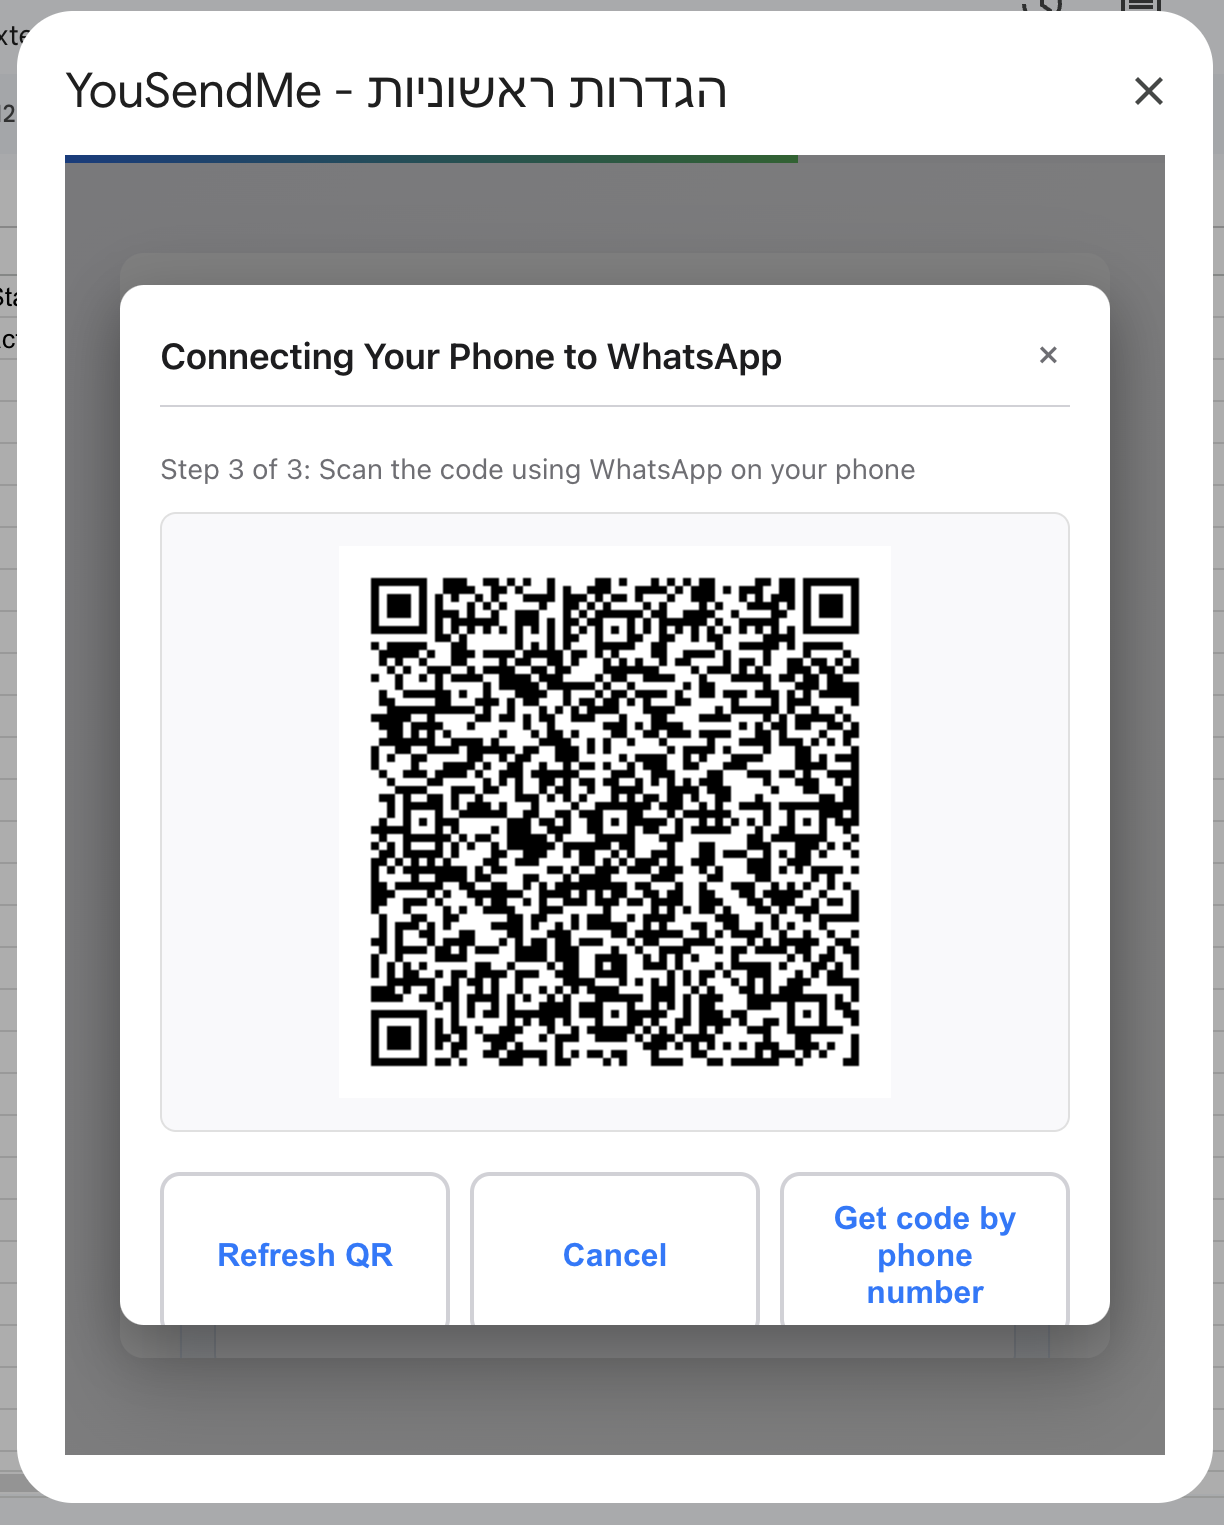
Start by choosing how you want to connect. Free setup requires your own Green API credentials. Premium users can either use their own Green API credentials or choose the managed route and finish the QR or verification step first.
- Connection choice comes first and changes what the rest of setup looks like.
- Temp folder setup matters for uploads and intermediate send assets.
- Trigger activation matters for form-driven and automation-related flows.
- Delay and country defaults should be saved before you consider setup complete.
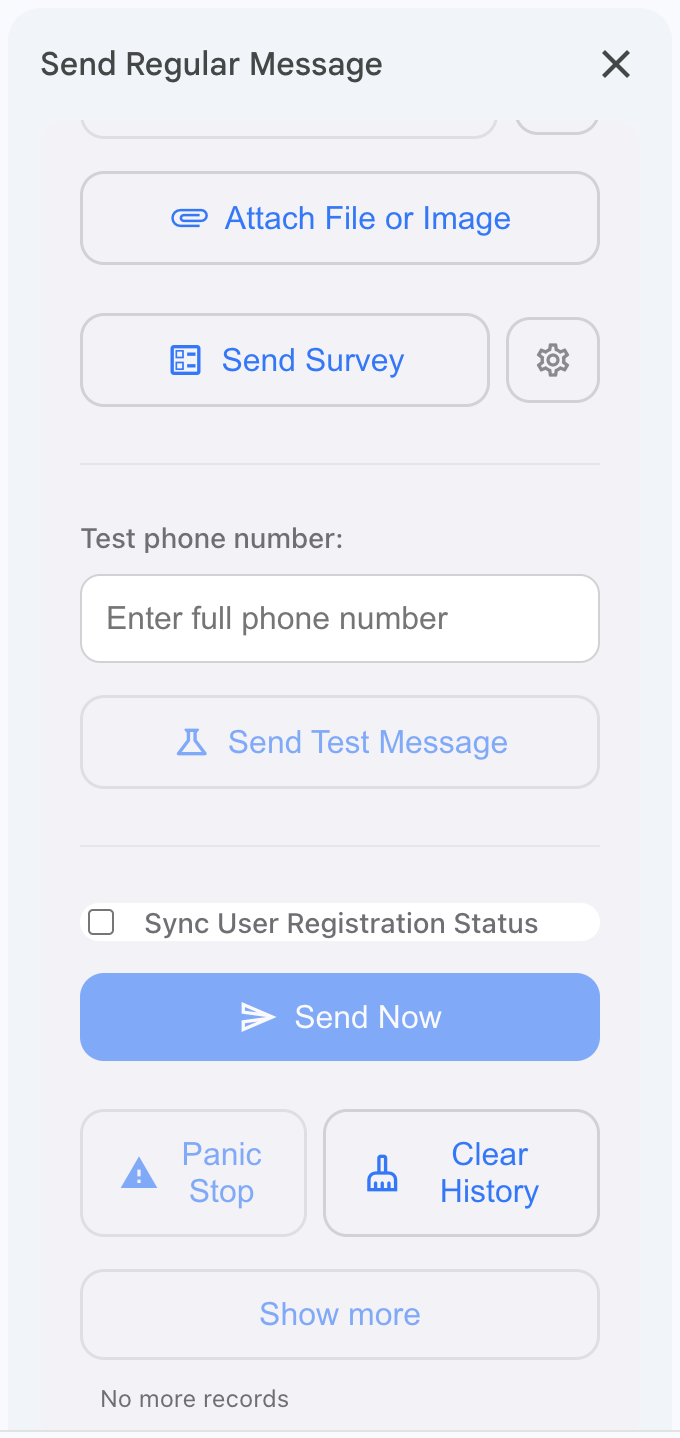
3. Regular Sending
Use the send sidebar for normal campaigns
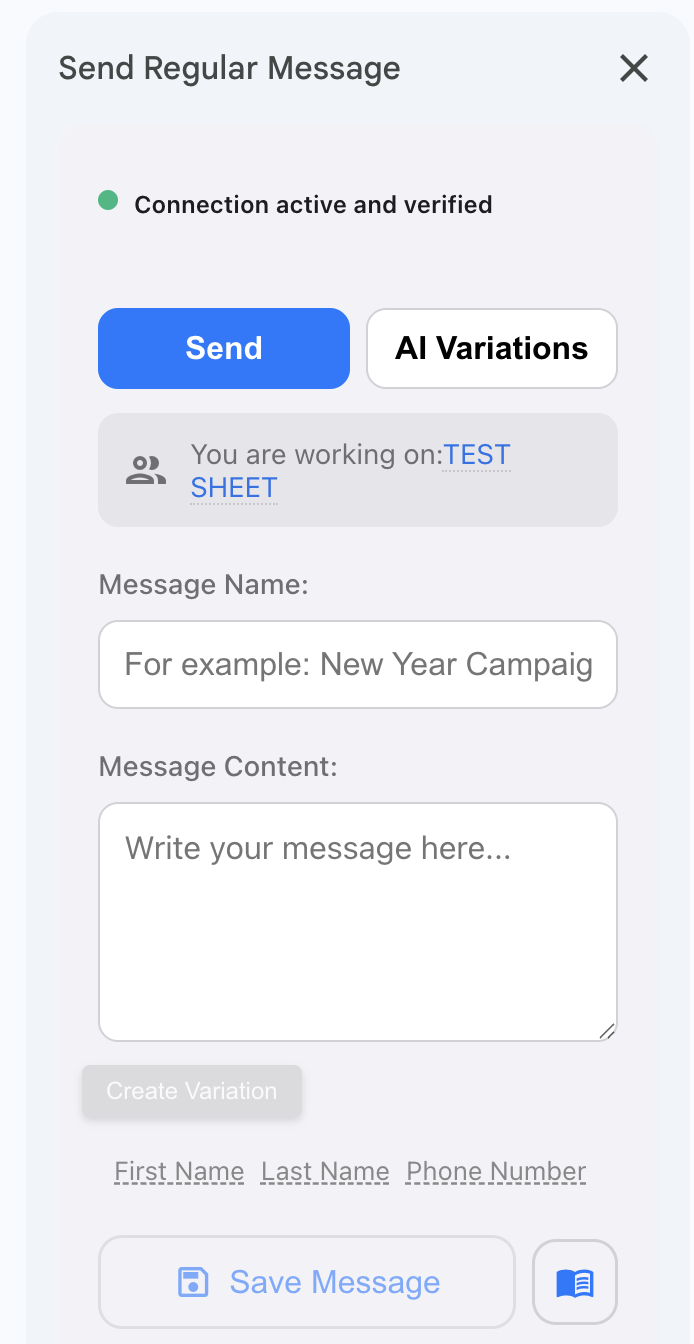
Regular sending is the core workflow. Confirm the active sheet, give the message a readable name, write the body, and review before sending. Most sending mistakes come from using the wrong sheet or leaving old message settings in place.
AI variations are not a default requirement. Use them when you want controlled variation logic. If you are just trying to send a straightforward campaign, keep the workflow simple.
- Confirm the active sheet and audience rows are correct.
- Name the message so it is readable later in summaries and history.
- Write the message and insert merge fields only where they are actually needed.
- Review the lower controls before sending, especially if this sheet was used before.
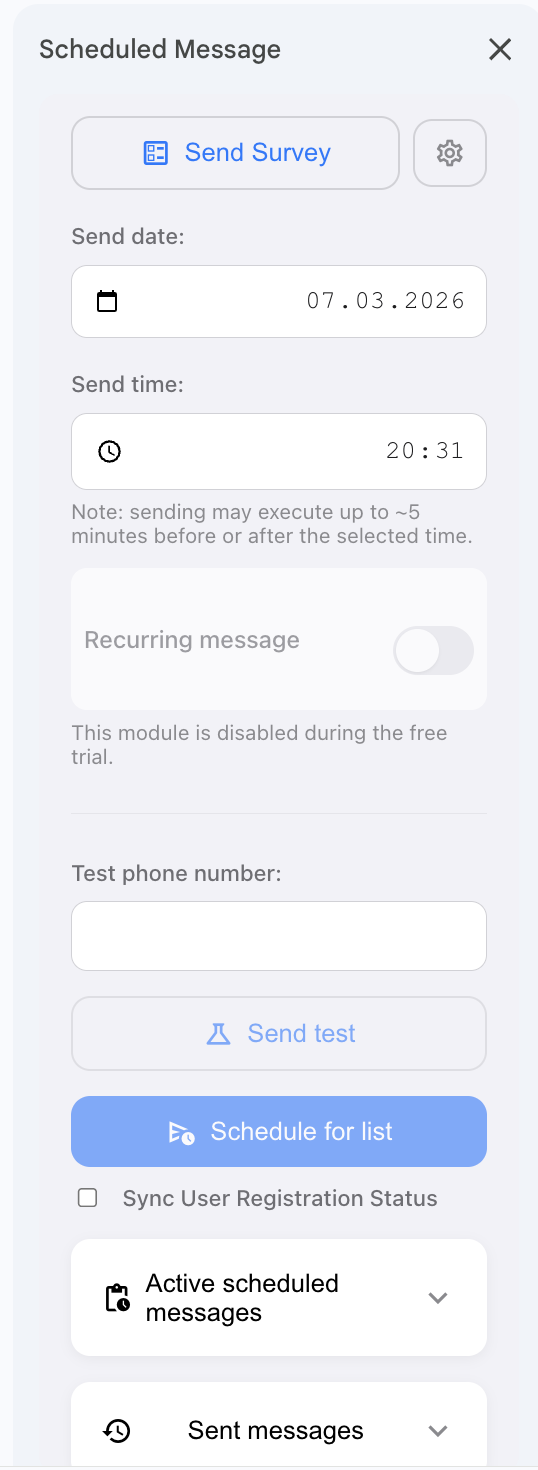
4. Scheduled Sending
Schedule messages when timing matters more than immediate sending
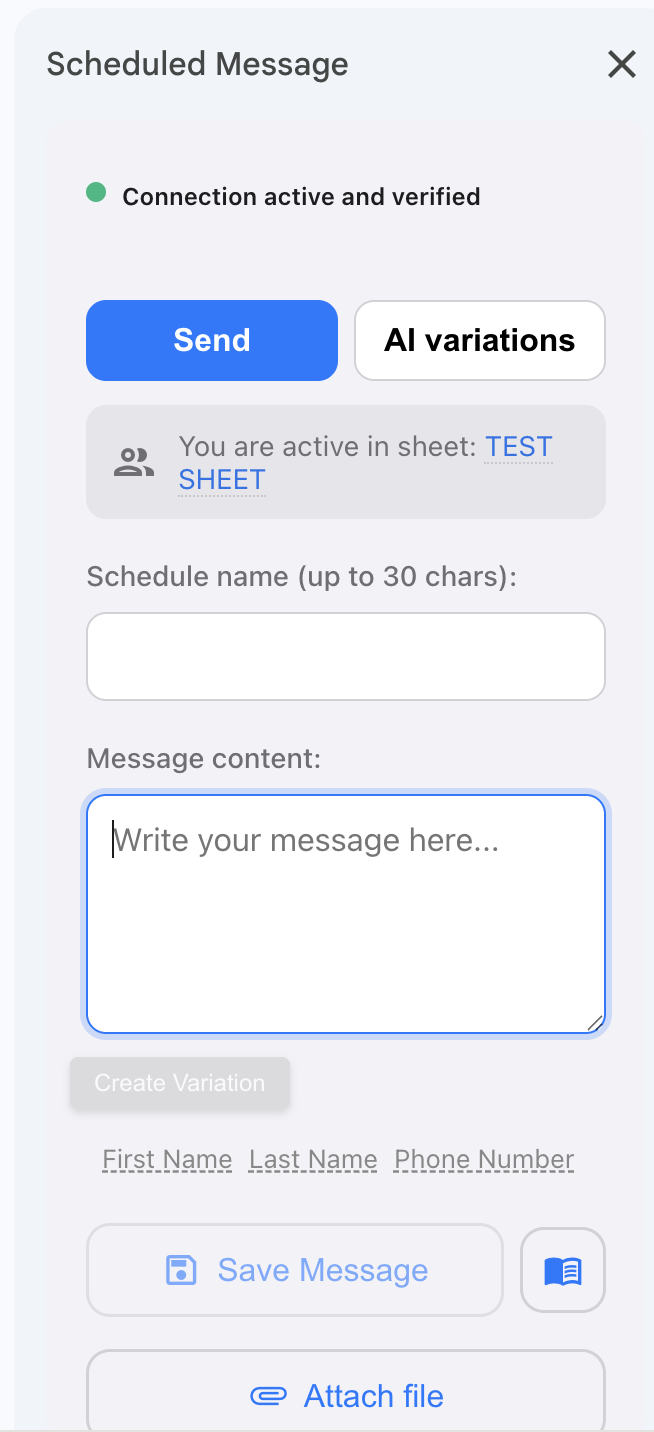
Scheduled Send is included on all plans. On the free plan it remains limited, while paid plans get the full scheduling flow. It uses the same send pipeline as regular sends, but the timing fields become part of the job definition, so this is where small mistakes matter.
- Set the target date and time carefully.
- Double-check timezone expectations before saving the schedule.
- If the schedule controls are missing, check plan entitlement first instead of troubleshooting the sheet.
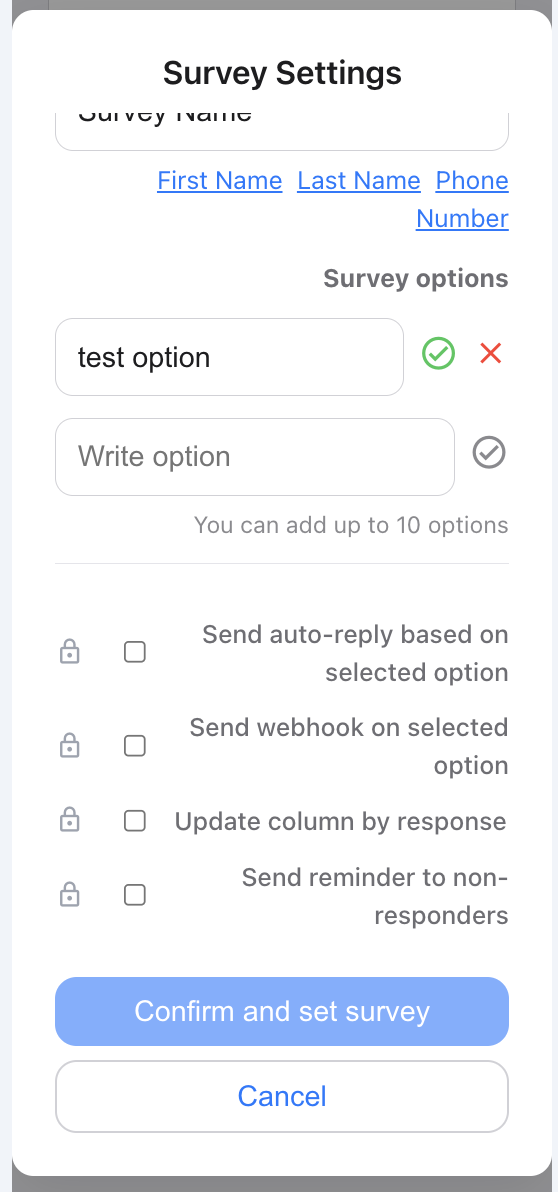
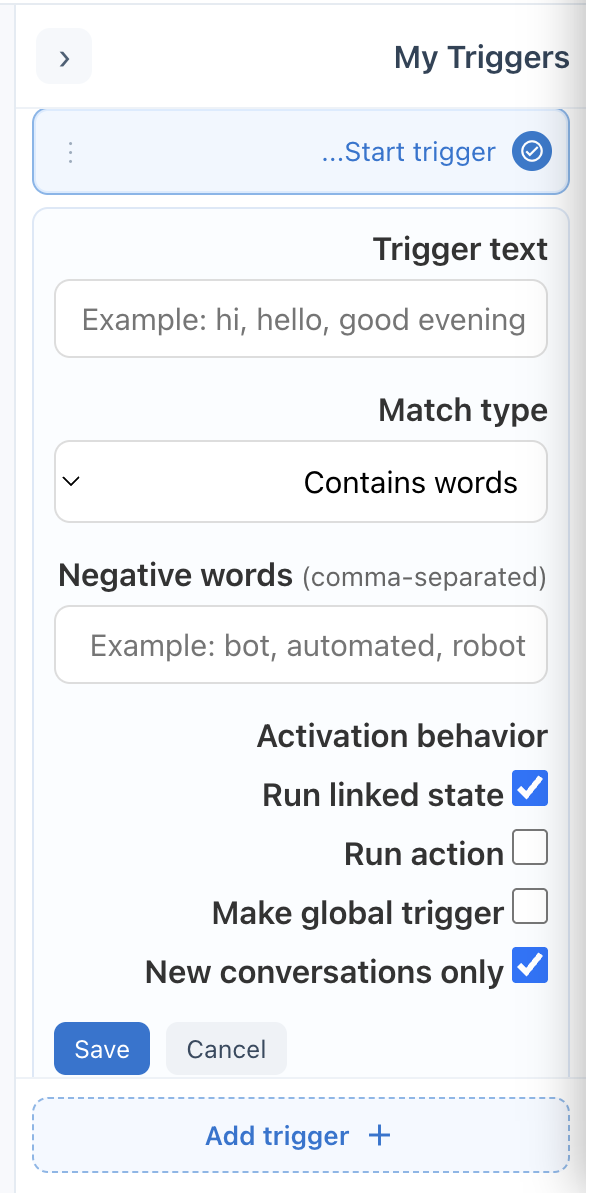
5. Surveys & Automations
Use surveys as part of sending, then add automation when the plan allows it
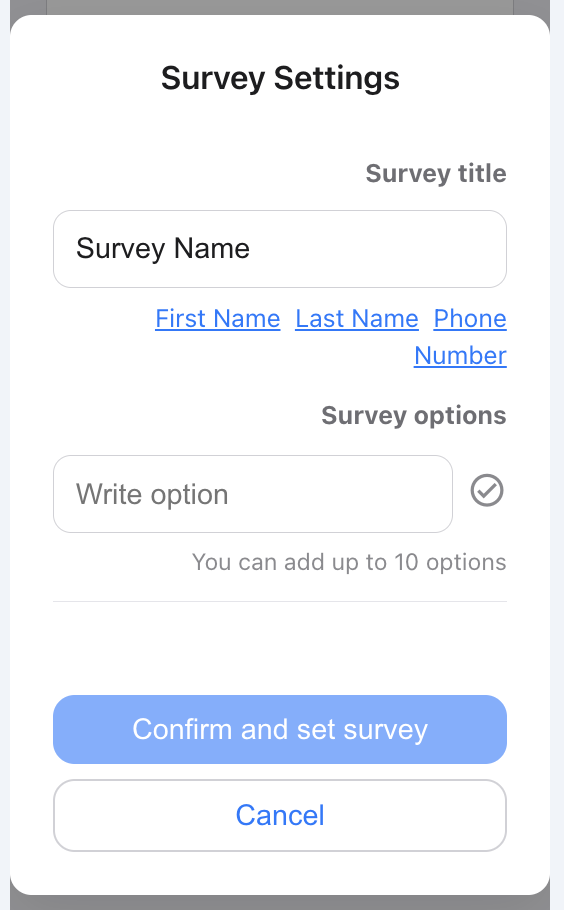
Surveys are part of the product baseline, but survey automations are plan-gated. Personal can use the survey flow itself. Business and Professional can also enable auto-replies, reminders, webhook actions, and sheet writeback.
Webhook activation is a dependency for some automation behavior. If automation is not firing, check entitlement first and then check webhook readiness.
6. Bot Designer
Build node-based bot flows without writing code
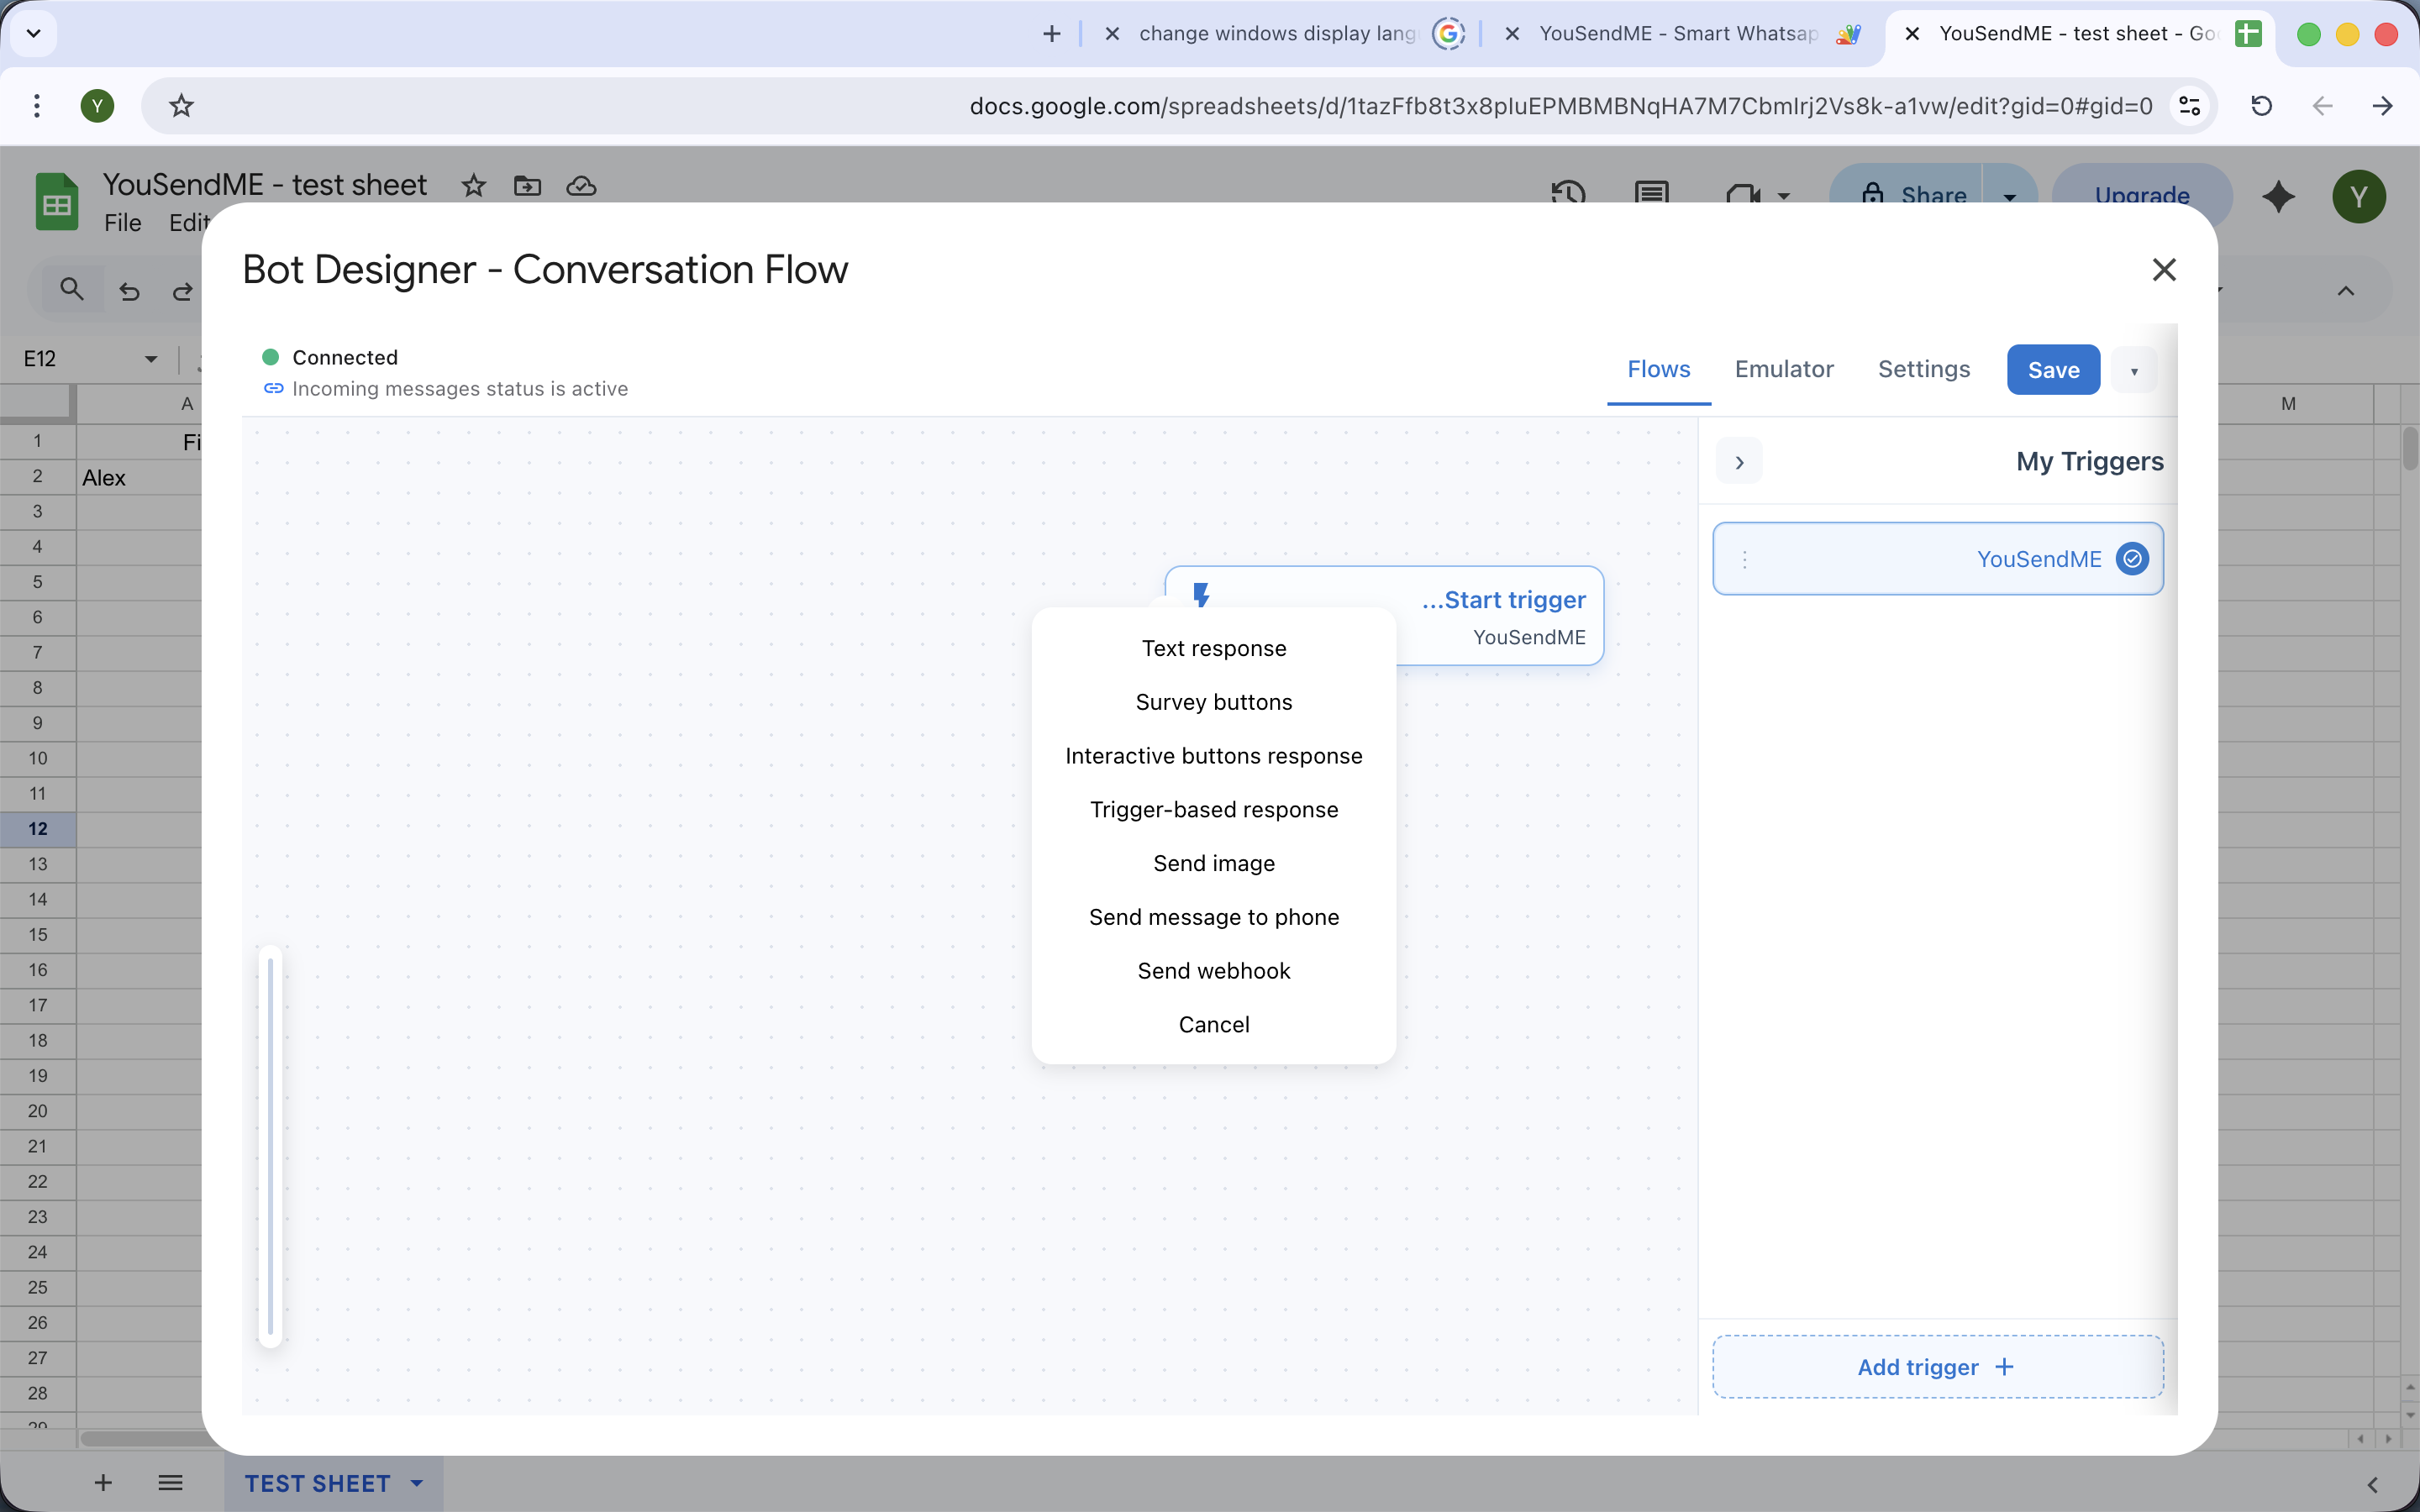
Bot Designer is an extension-grade feature. It is included on Professional and available as a paid add-on for Personal and Business. The practical rule is simple: keep the flow readable before you make it advanced. Hard-to-read trigger trees and wide node graphs become hard to debug later.
If you need Airtable writeback inside a bot node, you must also have Airtable entitlement. Do not confuse general bot access with every integration node being available on every paid plan.
7. Control & Reporting
Use Control Panel and Message Summary Center for visibility
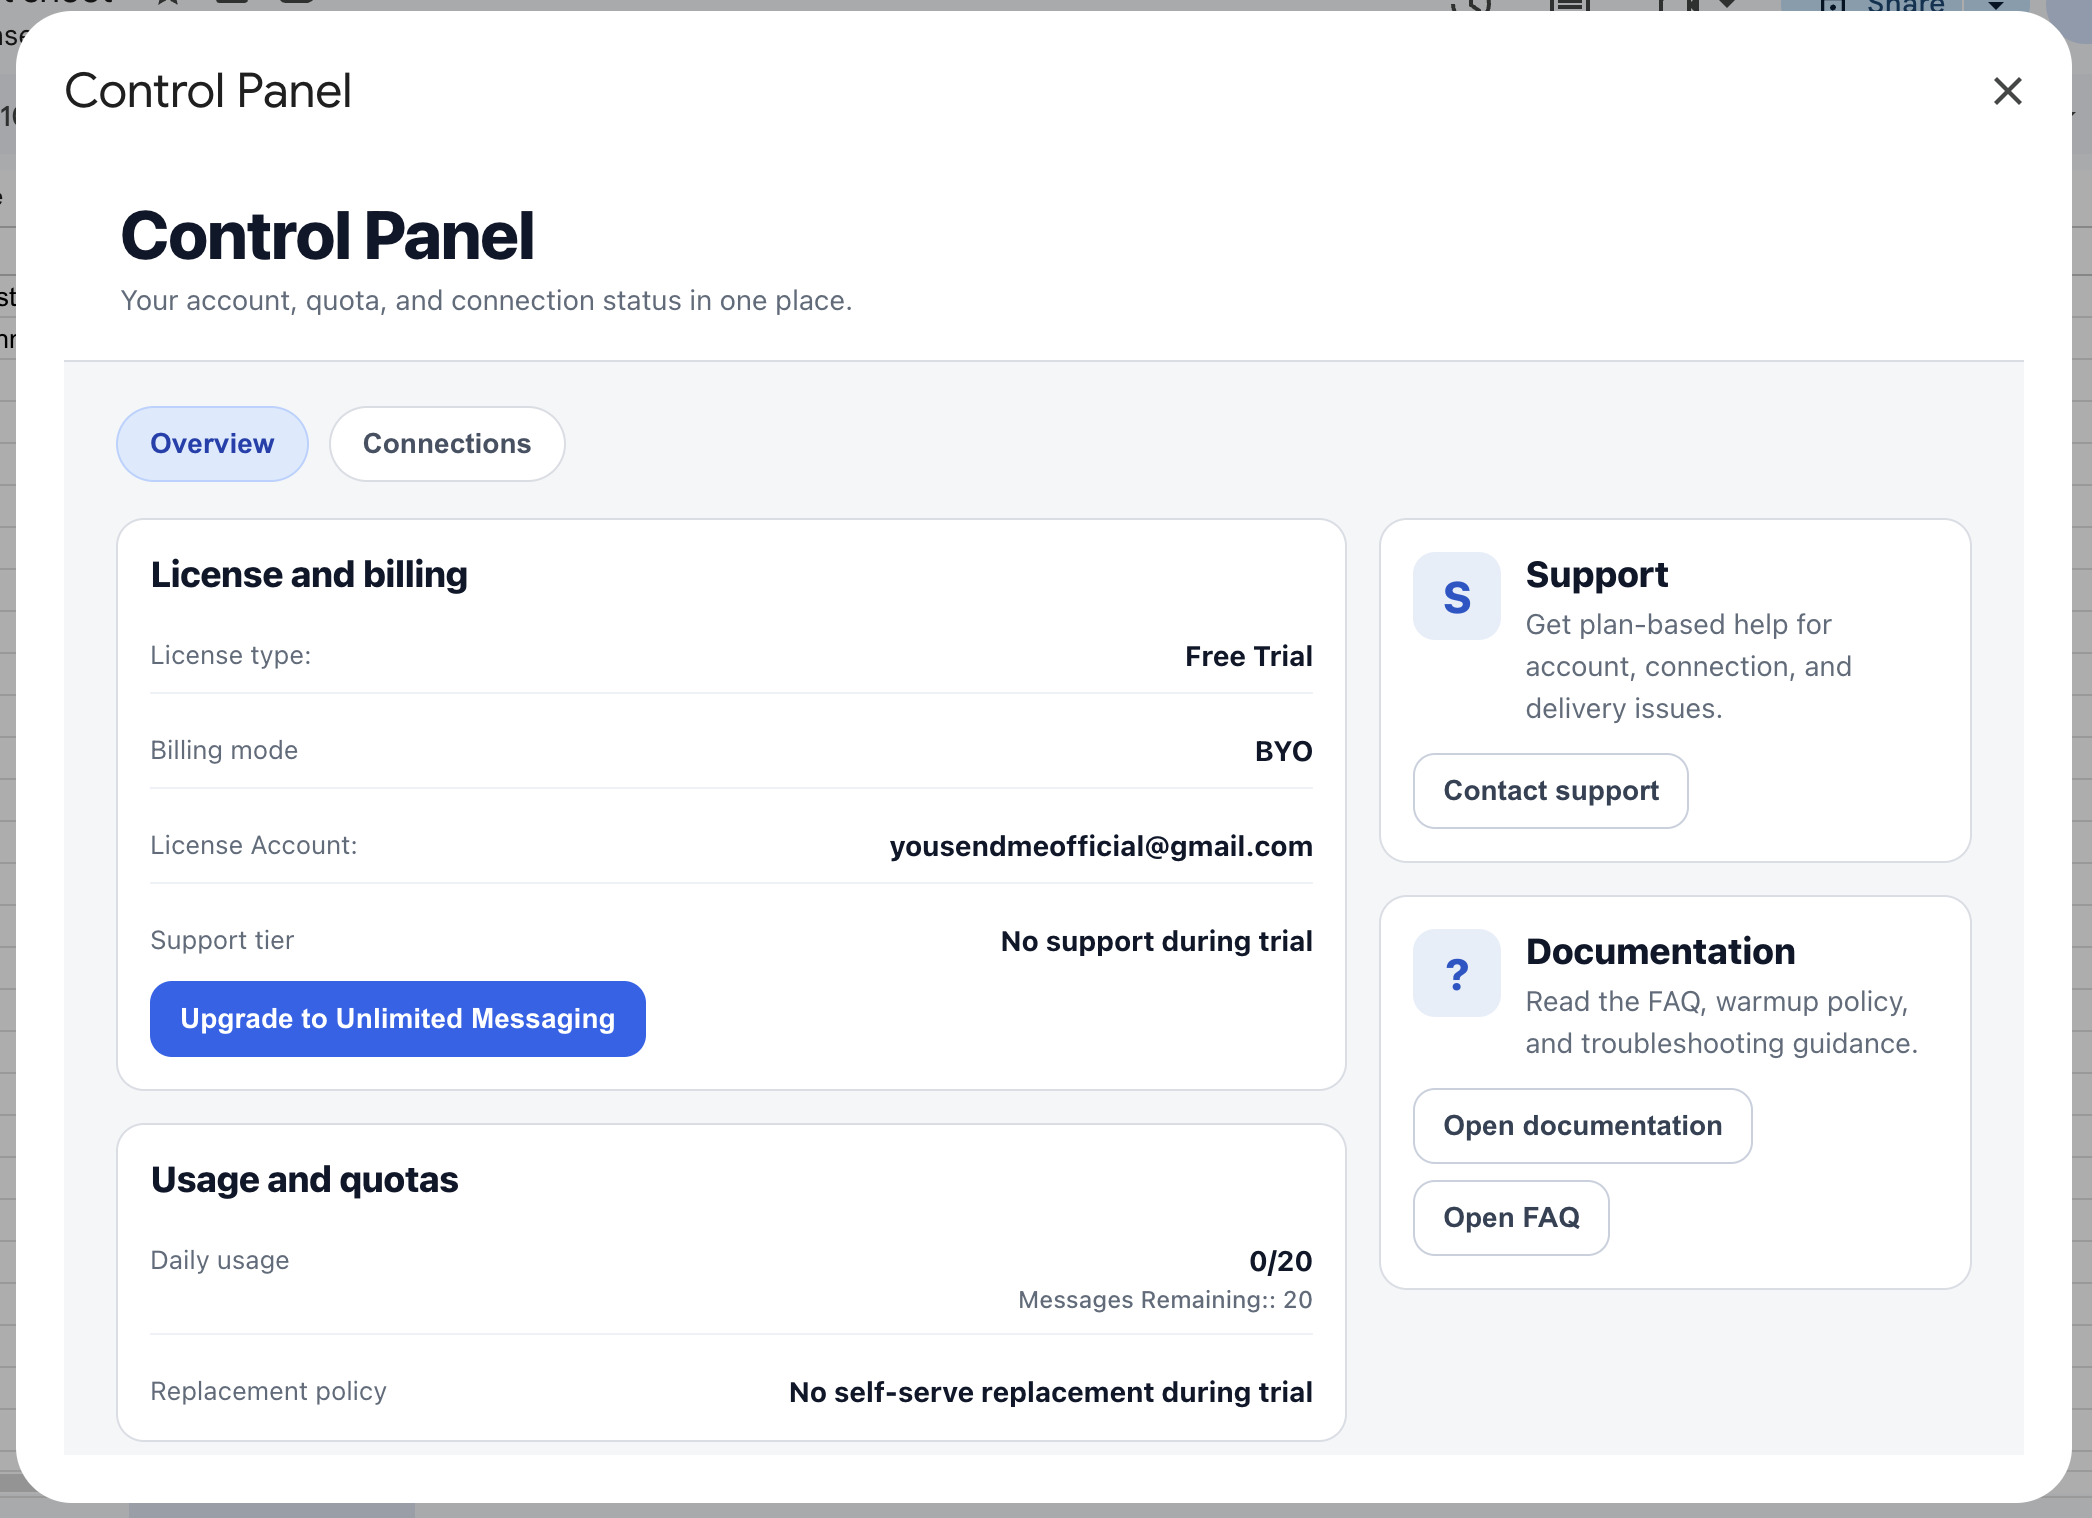
Control Panel is for operational context: plan, quota, support tier, and connection-related status. Start there before troubleshooting deeper. It prevents a lot of wasted time on problems that are actually plan or account-state issues.
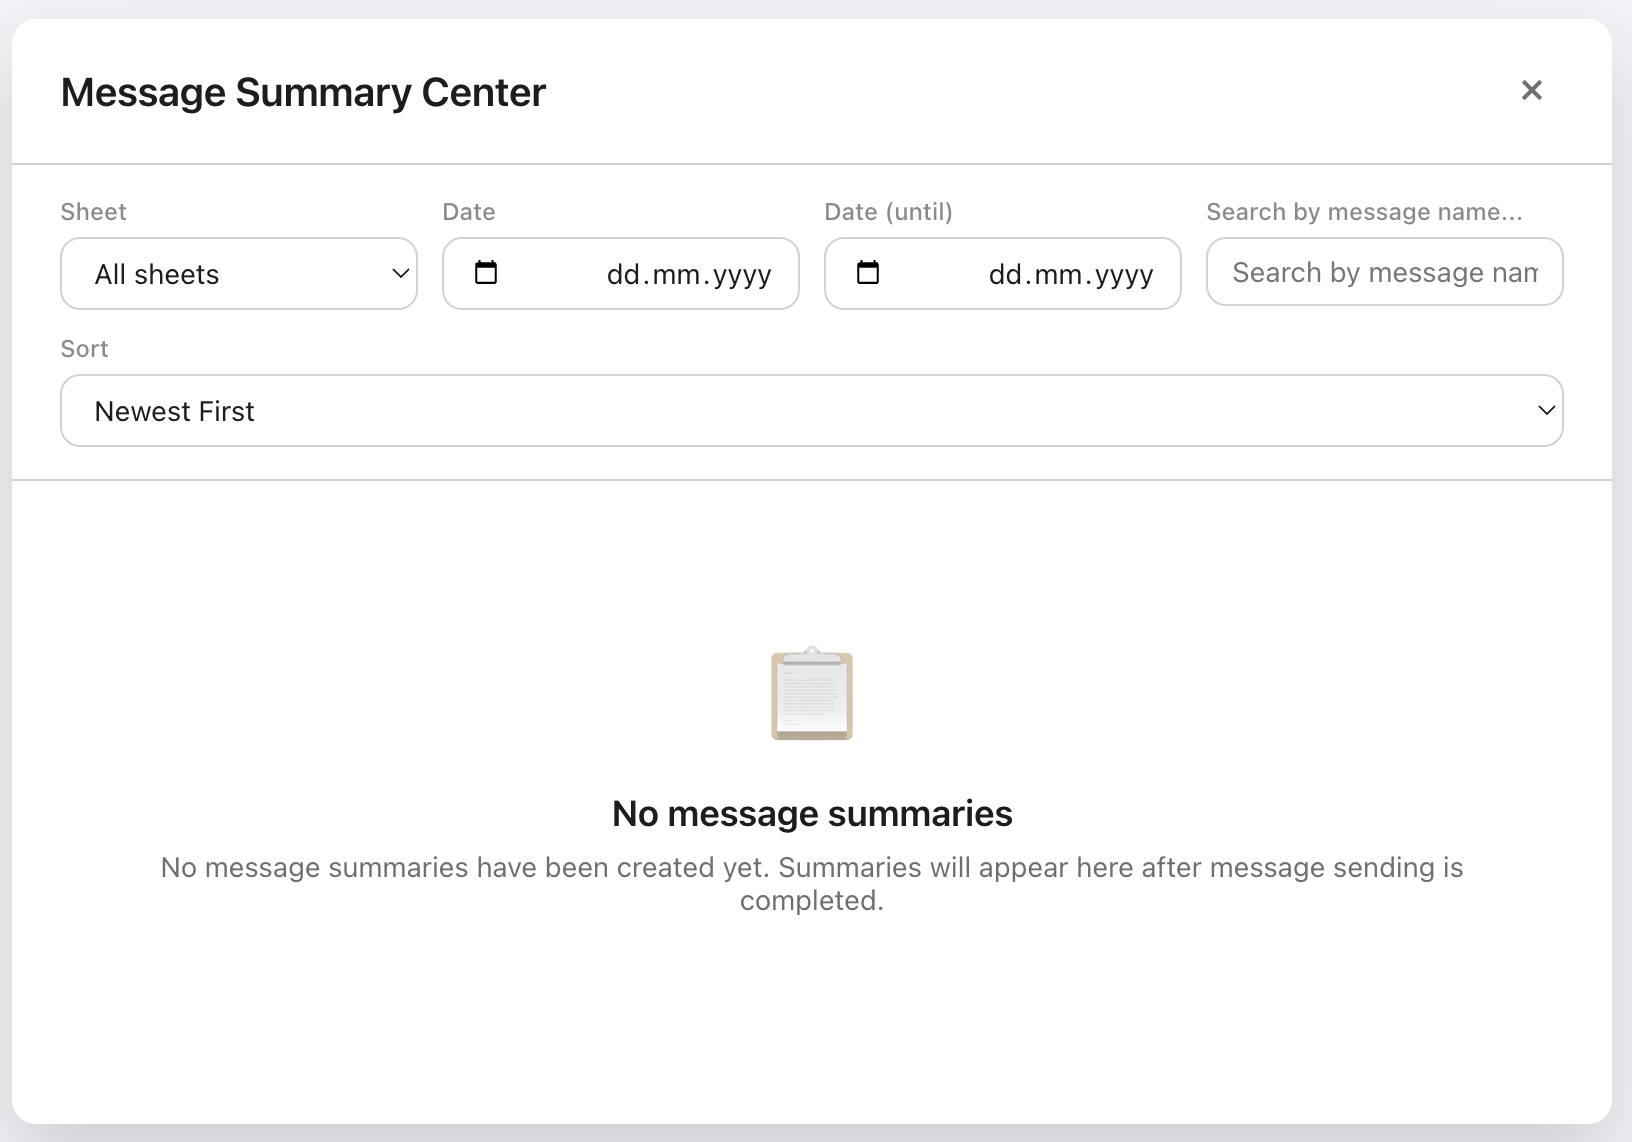
Message Summary Center is available on Business and Professional. Use it after real sends exist. If there are no completed sends, the screen may be technically available but not useful yet.
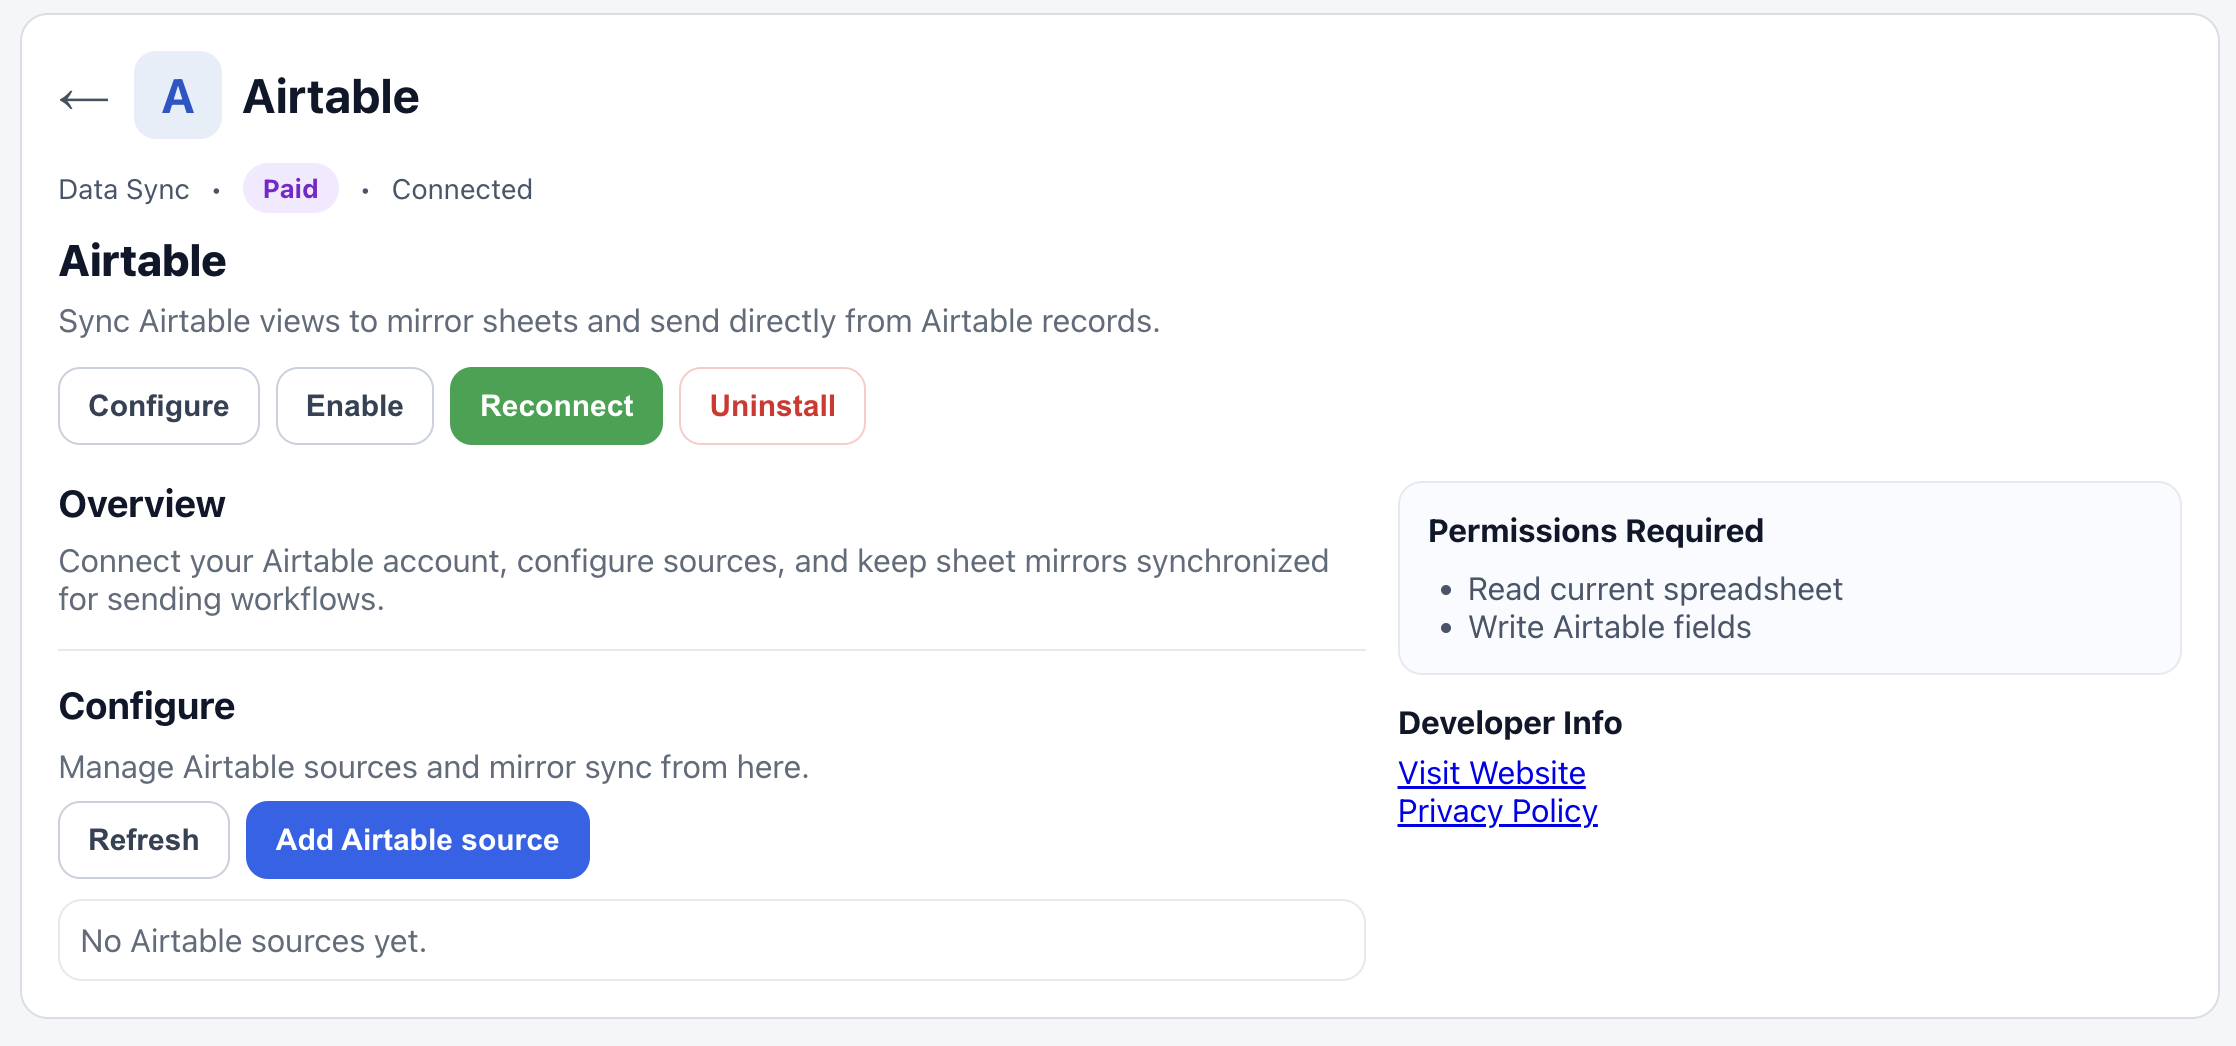
8. Extensions & Airtable
Use extensions for optional capabilities, not for core sending

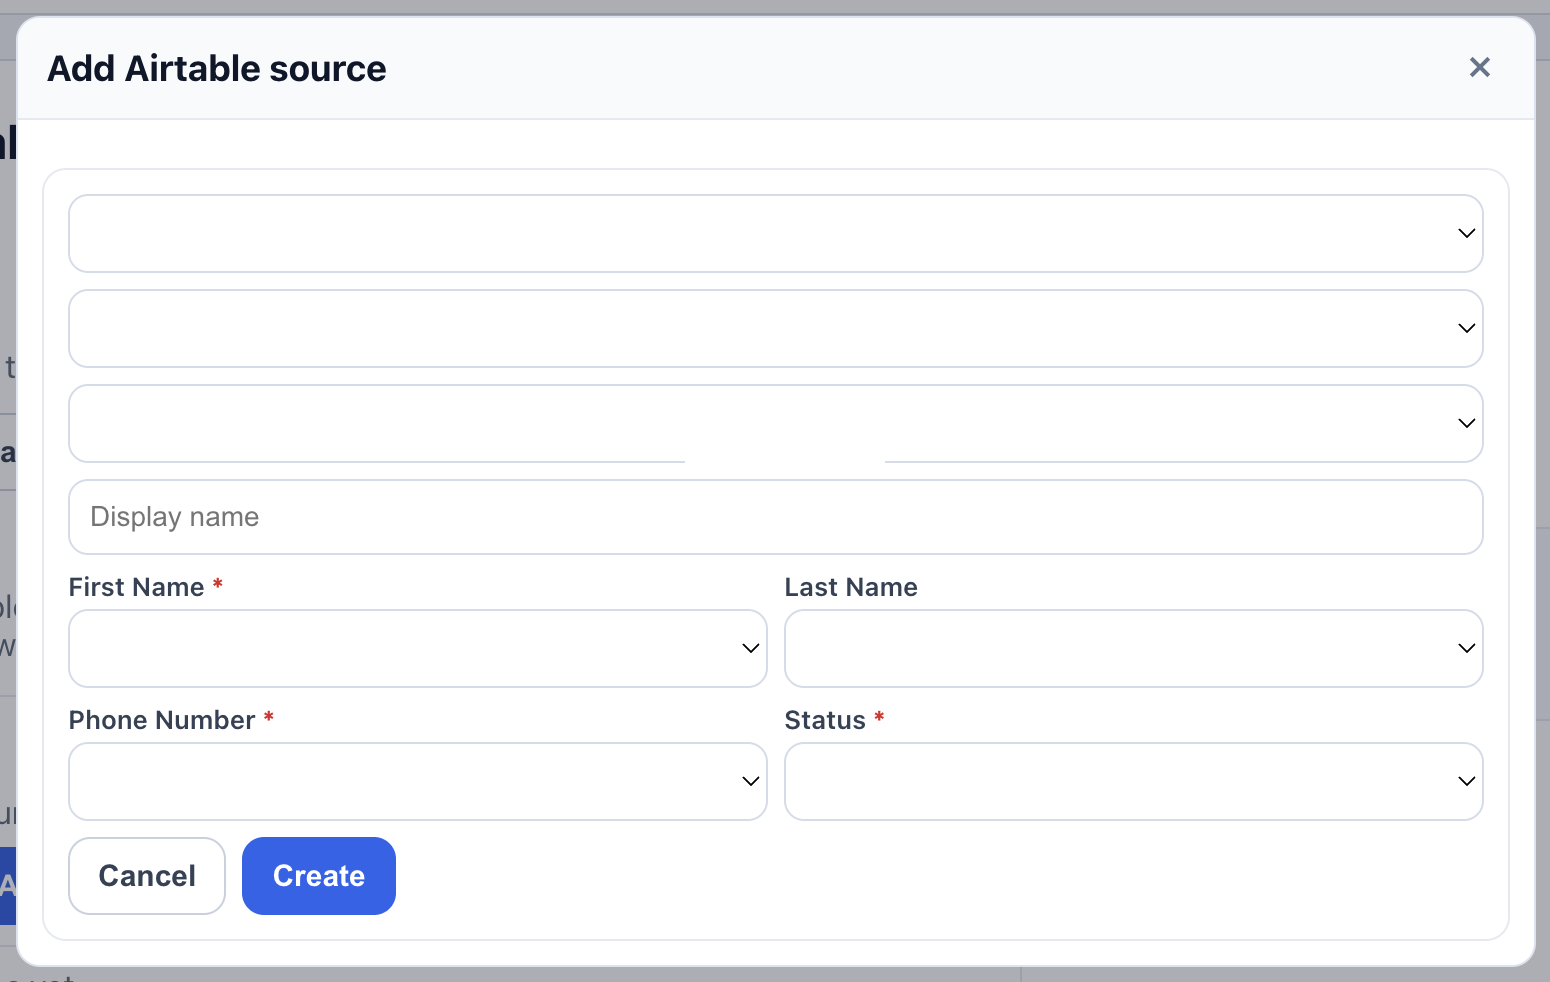
Extensions sit beside the core send flow. Airtable does not replace the normal sending pipeline. It syncs an Airtable view into a mirror sheet, and then YouSendME sends from that mirrored sheet using the normal flow.
Airtable is included on Professional, available as a paid add-on for Personal and Business, and unavailable on the free plan. If the feature does not appear, first check entitlement, then confirm the extension has been enabled.

9. Troubleshooting
Start with the symptom, not random setting changes
Setup flow does not start
Use the extension menu and then the Start Here or initial settings path. If you already finished setup once on that sheet, reset initial settings on a test sheet and reopen the flow.
Phone or connection is not verified
Return to the connection step and complete the authorization path there. If you are using an existing instance, validate the BYO path instead of continuing through the rest of setup blindly.
Survey automations are not firing
Check plan entitlement first. Then verify webhook activation and confirm you configured the automation block, not just the survey block.
Scheduled sending is unavailable
Scheduled Send is included on all plans, but the free plan is limited. If the control is absent or unusable, confirm entitlement, extension state, and free-plan limits before investigating the sheet.
Airtable does not appear or cannot be used
Confirm that the account is entitled to Airtable, the extension is enabled, and the Airtable source setup completed successfully. Airtable sending depends on the mirror-sheet model.
Message Summary Center looks missing
Summary Center is documented for Business and Professional. Also check whether you have completed sends to report on, because an empty reporting surface is different from a missing one.
Need to exclude contacts from sending
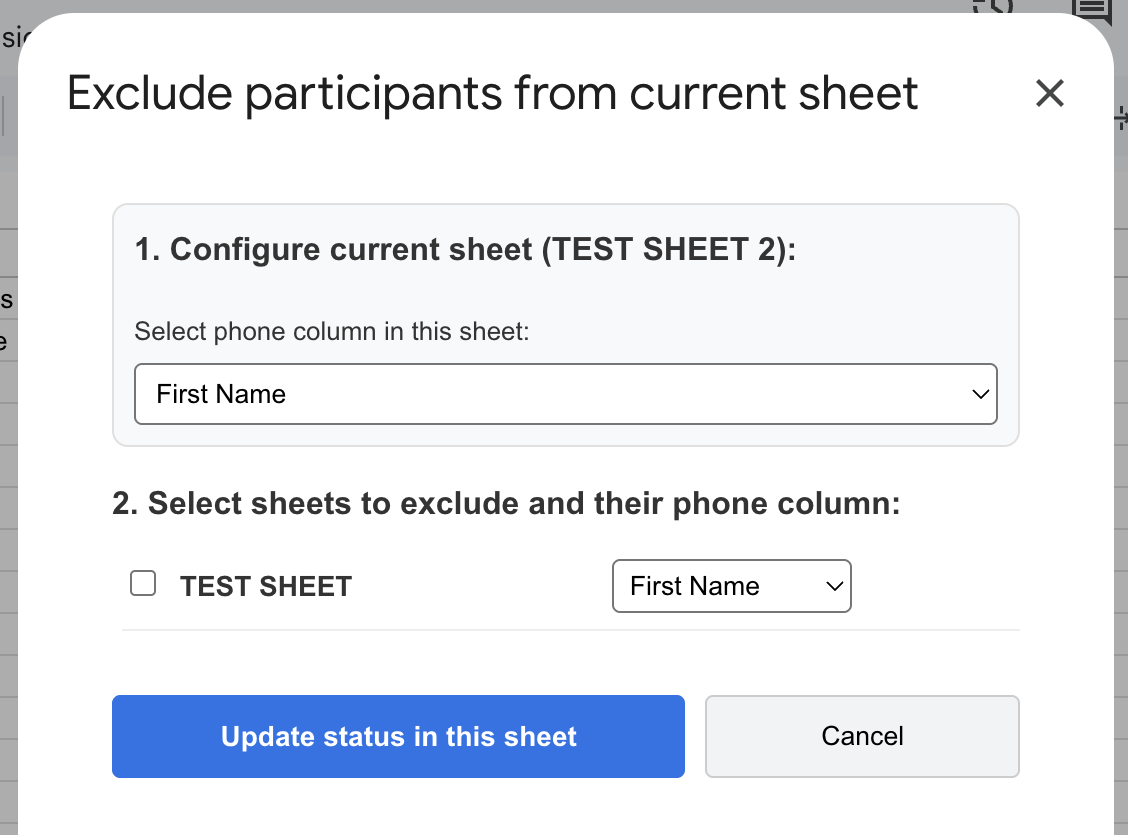
Use the built-in exclusion controls instead of hacking sheet data in the middle of the workflow. It is safer, easier to audit later, and easier to undo.
No matching documentation sections
Try broader keywords like setup, survey, bot, Airtable, or summary.